Showing posts with label log cabin. Show all posts

Log cabins and a bit of post Christmas sewing

I was gifted a skinny quarter pack by a good friend last year, and I don't know if its bad manners to gift it back to her, but I figured if I made her a table runner out of it first, she would like it more!
 I had to enlist help from another friend to decide on the layout of this table runner. I used a Jo Morton pattern, and did not think ahead about how much those centre squares would dominate.  I liked both settings, but Lisa said go the diagonal, which I did.
Then it was just the matter of quilting.....my least favourite job, but perfect occupation for a heatwave!
I also made two mug rugs for the same friends out of my scraps, one tradition and one modern. 

Once my Christmas visitors left I had some time to start sewing - and given that we had four days of 40c plus in a row, sewing was the only sensible thing to do!


It was not sensible to start the Bonnie Hunter mystery Frolic when they are already up to part 5, but what the hec, I did anyway!  I don't seem to get any sewing done in the mornings (between tackling Mount Washmore and watering the garden) but an afternoon of sewing enabled me to finish half of the required four patches...half LOL!  I didn't pre read the instructions and the four patches are tiny....but I did check my seam allowance as Bonnie instructed and perfected it before I started.
I am committed to this quilt now, but only a half sized version - my stash/scraps wont hold up to the full size in the set colours (and I love these colours) and I want to avoid having to buy any fabric...which is wistful thinking as I used all my aqua in last years Rainbow Scrap challenge!
Happy quilting Sue.

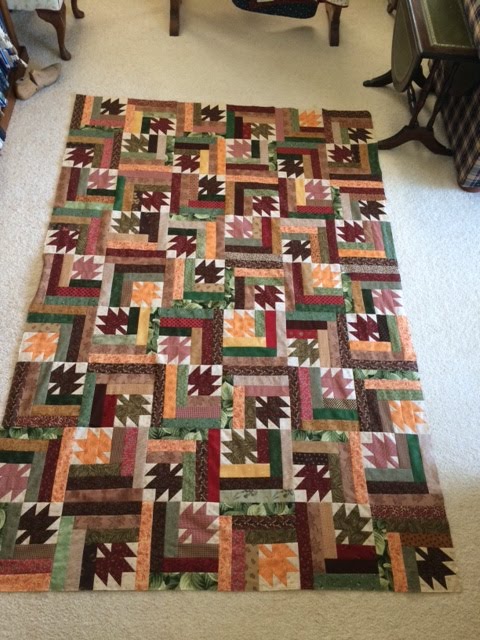
Maple leaf log cabin flimsy finish...eventually

Light bulb moment realisation that I had all the blocks made for a whole quilt stashed somewhere in the house.  Found it and laid it all out....but I was one block short :( 
Drats! I am in the mood to sew a quilt top together.  Only solution is to make it narrower by one block and add a row instead.  Started webbing top together - and realised one block in the last row had came unpinned.  Stopped, pulled it all up from back of sewing machine (where it was sliding down as I sewed) laid it out on the floor.  Crawled around on the floor...found missing block...YIKES there's another block - the original missing block, PLUS an incomplete block.  Sigh. :(
Persistence is something I preach to the kids!  Ignoring the now extra blocks, I kept sewing!
Ta da!  Finished quilt top - little bit longer, not as wide, but most importantly its finished!
I will take a flimsy finish any day!  It might be a fall quilt finish in Spring, but who cares!  
I had a good rummage through the stash, but there is no suitable backings for this quilt, so putting it aside til I can go shopping. 
Pattern is called Scattered Leaves by Pam Burda, published in American Patchwork and Quilting October 2009, finished at 53 x 80".
Happy quilting Sue.
PS.  Stop Press - I just realised the pattern calls for a border.  I will contemplate that when I see what suitable fabrics the shop has to offer!  

Log cabin from pre cut strips out of my stash

I am ashamed to admit there are no real progress photos of this quilt!  I needed a quick fix of mindless piecing and grabbed my box of  home made (using up stash) pre cut 2.5" strips.  I had a plan (e.g. pattern) for log cabins using red and green fabric with stars at the intersection of the blocks. I didn't give a lot of thought to contrast and therefore the original plan failed.  
 So I had to move to plan B, plain Jane log cabin blocks.  Well, first good friend Lisa came around and provided the motivation to make up a plan B!  Prior to that there was great temptation to stuff them in a corner and ignore them!  So first some unpicking.  And a bit of rethinking, but not too much!
 Some blocks are "red" and others "green", but in the end the mix works really well.  Mind you that blue/green strip sticks out more then you would think!  The blocks are suppose to be 12" finished but I had to trim them back a tad, so the flimsy comes in at 59" x 71". Not bad and I used up loads of scrap!
No border required, I am done with this top!  It might be pushing my luck, but hoping for a suitable backing in my stash!
Next: I made up these little stars, rotary cut (with a freezer paper template) and machine stitched.  The next step is backing, stuffing and a button is sewed in the center, hiding all imperfections ; )
I am hoping these can serve as cute Christmas Tree decorations - the pattern is from Kim Diehl's new book "Simple Christmas Tidings".  
Happy quilting Sue.


Swap items I made and sent

 This is the wool pin cushion I made Deb for the Pin Cushion swap that Susan  organised.  I had brought the pattern (Pear Tree Pincushion by Hatched and Patched) on a trip to the Warracknabeal patchwork shop previously, but it seemed fortuitous as I could see from her blog, that Deb loved Anni's patterns.
It was also great to find some crushed walnut shells at Quilt Convention, as they made the pear sit nicely without falling over!  
This is the first pear I made from my Anni Downs pattern....being new to wool I wanted to see how it sewed up with the stitching on the outside.  I loved it and was going to keep it for myself...but Vicki was having a birthday, so it made a nice gift.  I will make another one for me!
And lastly but not least, this is the reproduction dolls quilt I sent to my swap partner in USA.  Now we didn't have blog addresses, so I had no idea who I was making for or their tastes.  So being a lover of traditional patterns, I decided everyone loves a log cabin!

 I decided to quilt it very simply in the ditch, but used a stencil to quilt a "orange peel" around the border.  I have never made this variation of log cabin before, but I thought it complimented the mix of colours, as I wanted some brights and some darker colours.  My partner sent me an email recently to confirmed it arrived safely, and she loves it, phew!
Happy quilting Sue.  


Its hot, hot, hot, budgie!

While it has been hot, hot, hot here, this morning some light rain and a drop in temperatures has been appreciated by everyone in the family....including our new (first ever family) pets!
Welcome Snuffleupagus (grey boy) and Emily (green girl) Budgie.  There are lots of words related to patchwork that the spell checker questions me about, but apparently Snuffleupagus is a word, cos its in spell checker!  Our six year old son named the budgies and in case you didn't know Emily is a green female train from Thomas the Tank Engine and Snuffleupagus is a large hairy mammoth like creature on Sesame Street!  
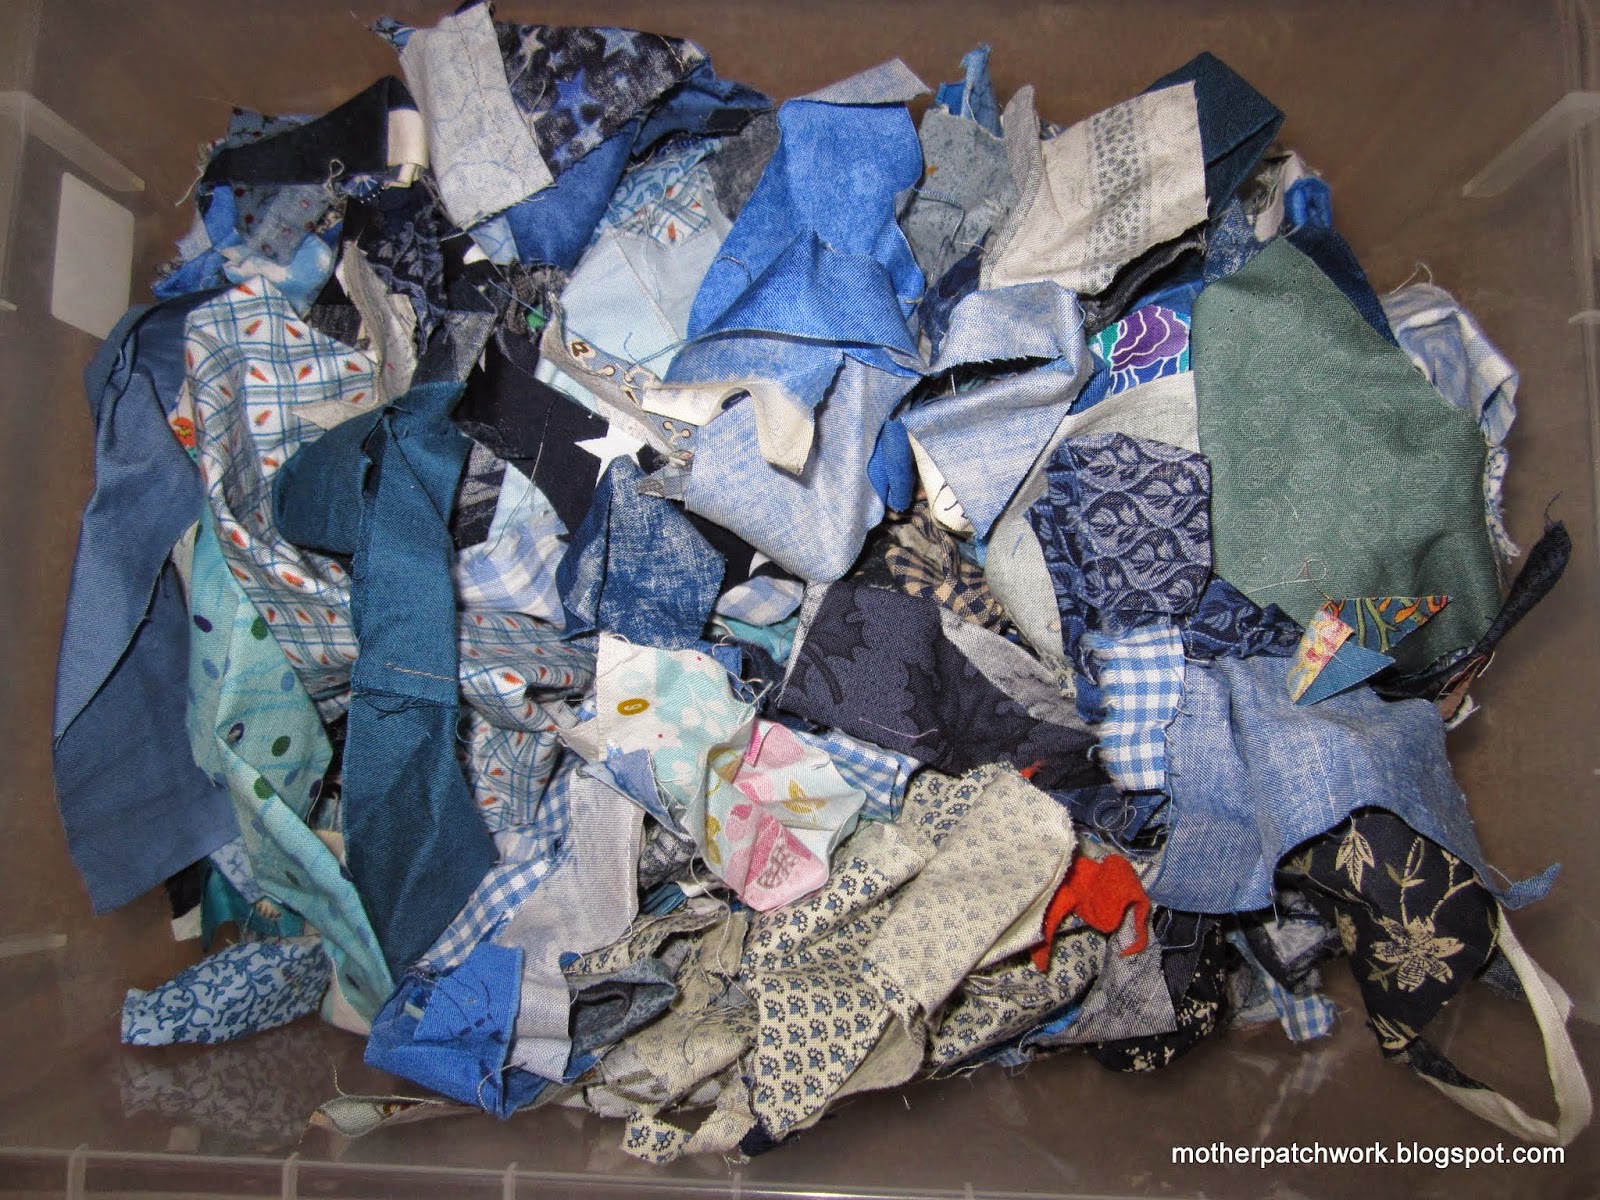
Right back to quilty things - this is my box of scrap blue fabrics.  It was compressed into 2 zip lock bags of A4 size when we moved house - but has grown since being released into a box!  While it has been hot I have been ironing (argh) and cutting (bliss, love my Go cutter) the larger pieces into triangles and squares.  See my new box...loving Kmart fishing section!
The partitions are really deep in this box.  There is literally one green triangle and about 40 in each stack of the blue.  The question is - should I use the triangles to make my leaders and enders blocks OR
should I make something new!! Like Ocean waves???  
Sigh.  I am a little ahead of myself...no white triangles yet! 
BUT I do have lots more log cabin blocks, 83 to be exact.  This has been a fun project during the heat of the day.  Hmmm except I am about to run out of the red I was using for the centres.  
SO 
I either make the blocks bigger (currently 5.5"unfinished)
OR 
I start using different reds for the centres?
I want a big quilt!
Happy quilting, Sue.

New unplanned projects

I finished the mini log cabin wall hanging!  Technically the pattern was in the winter edition of Quiltmania and had a little holly leaf on it, but I thought it would just make a great all year around wall hanging to add to my collection...now I just have to convince hubby to put up some hooks for me!
My little school house wall hanging has stalled, as I decided I hated the sashing and cornerstones that I added.  I think the problem is that there is no contrast, because I have used positive and negative blocks together.  I cannot bring myself to use black, but I am beginning to think that a grey or very dark background might be called for.  I am avoiding the unpicking, hence it is being ignored in a corner somewhere.
 I cut backgrounds for the sunflower dresden blocks and got them sewn down, just have to make some centres. I think they are going to be cushions, but we will see.
On Sunday I did another complete flip and started a whole new project.  I saw a tiny ad in a magazine, featuring a charm pack I happened to own - and had no idea what to do with.  
So I started cutting, love the fact there is little required and stitched away the afternoon. Added some pink/white polka dot sashing from my stash.  Then had to nip to the shops to find fabric to make a external sashing, when my stash bit ran out.  I am loving the purple polka dots and don't mind a bit that it doesnt match.  
So now just contemplating if this cute cot quilt flimsy is getting a cotton or minky border.  At this stage I am thinking something warm and cuddly for the backing as well.
This is another attempt to lure the kids into helping me with/enjoying some gardening.  I read this tip in the last edition of Gardening Australia magazine. When you cut off the ends of the spring onions you can "plant" the root end into cotton wool, keep it moist and it will reshoot - you can see the ones that reshot on the right and the next ones I have planted on the left.  Once the roots had a couple of centimeters of green on them I planted them out into the real vegie garden.  So I am hoping that I am going to have a ongoing supply of spring onions, by just replanting the roots!
Happy quilting, Sue SA.

Sewing weekend at Bordertown

I had a fantastic fun long weekend away sewing with my Mum and two friends.  I managed to start and finish piecing two miniature quilts/wall hangings, which I am thrilled about.
This pattern is called Sugar and Spice by Rhonda McCray and was published in the Special Winter 2013 issue of Quilt Mania and is 12" x 16".  I need to applique the gingerbread men in a bowl (in wool) in the bottom right hand corner, hence the different layout of the log cabins.  The logs are cut at 1" and the pattern would never have worked if Vicki hadn't pointed out that my quarter inch seam (I was whinging about it) was a tad too wide and I could rectify it by moving my needle position.  SEW glad she told me that as it solved all my sewing problems and provided a huge "ohhh, duh!" moment!
This pattern is called Rolling Stones and was designed by Ann Hermes and was published in the February 2008 issue of BHG American Patchwork and Quilting magazine.  However I have recently seen it advertised on their website, so you could possibly get it for free online.  It is 14" square.  This was a lot more work then the log cabin, but that was just because of the cutting.  I think I am still sold on making miniatures as they are so quick!
 
These basket quilts were NOT quick!  I thought that I had the required number of baskets made and would just be sashing them and fiddling with a few handles and the appliqued fruit.  But alas due to my inaccurate seam allowance the blocks were all 1/4" too small.  I unpicked more then I would care to share.  Then I discovered it was quicker to just make new ones, especially those with triangles, which stretched when I unpicked and resewed them.  I did manage to redeem a few that  I had unpicked though, so I decided to sash all the blocks that were correct.  That way at least I felt like I had made some progress.  The benefit of sewing in a group is to get everyones ideas.  So I am going with a layout quite different to the pattern, which I am really pleased about.  Lots more to do, but very happy all the boring unpicking was done in the good company of friends!  
Happy quilting, Sue SA.
PS also had a teeth grinding moment of terror, which Mum and Vicki rescued me from, when I managed to jam my needle down in the machine.  Due to some long thread ends getting sucked down and caught up inside.  At a later date I ran over these pins.  
I plan to be much nicer to my machine in future, as this bent pin going into the inner working of my machine would have been very very ugly and expensive!  

Kim Diehl star in a churn dash blocks

I was just popping in to read some of my favorite bloggers, after a six month absence!  Then I saw that there was this draft post, so figure...